AMD Kria (Zynq) Implementation flow
Setup
Our development setup does not need to change from your main computing environment. If you're developing on Beethoven on Mac/Windows, that's fine and you won't need to install Vivado to run your design. In practice, we have a remote EDA machine that's connected to our Kria board. If you have a Kria board/EDA tools installed somewhere then you can modify this procedure to your liking, but this is how we have it working.
EDA Machine
- RHEL 8
- Vivado 2024.2
- Vivado cable drivers installed for flashing FPGA over JTAG [link]. Only do the first command, adding users is unnecessary.
- Java 17 or older
Kria
- Petalinux
- CMake from source
- C++17 compliant compiler
Building and Flashing FPGA Image
When you've tested your design and are ready to deploy, we'll have to build the accelerator in Synthesis mode.
object MyAcceleratorKria extends BeethovenBuild(new MyAcceleratorConfig,
  buildMode = BuildMode.Synthesis,
  platform = new KriaPlatform())
If you're building in an IDE that supports remote development, you can use this opportunity to run this function on your EDA machine. The IDE should handle moving over all of the necessary files for running things remotely. Otherwise, you can commit your code, clone it on your EDA machine and run the main file that way. Both ways work perfectly.
Now, when you cd $BEETHOVEN_PATH/build/ on your EDA machine, you'll notice the following files.
(base) [chriskjellqvist@oak build]$ ls
beethoven              beethoven_hardware.h  hw      synth.tcl             vcs_srcs.in
beethoven_hardware.cc  cmake_srcs.cmake      ip.tcl  user_constraints.xdc
In particular, these .tcl files are the scripts we generate for building your Kria accelerator.
synth.tcl- the main .tcl that you should runip.tcl- generate any Xilinx IPs that you need or declared in your program
You can build your accelerator like so...
# enter the vivado shell
vivado -mode tcl
# start synthesizing
source synth.tcl
# once we're done, we'll use the GUI to deploy our design
start_gui
Now the following GUI should come up.
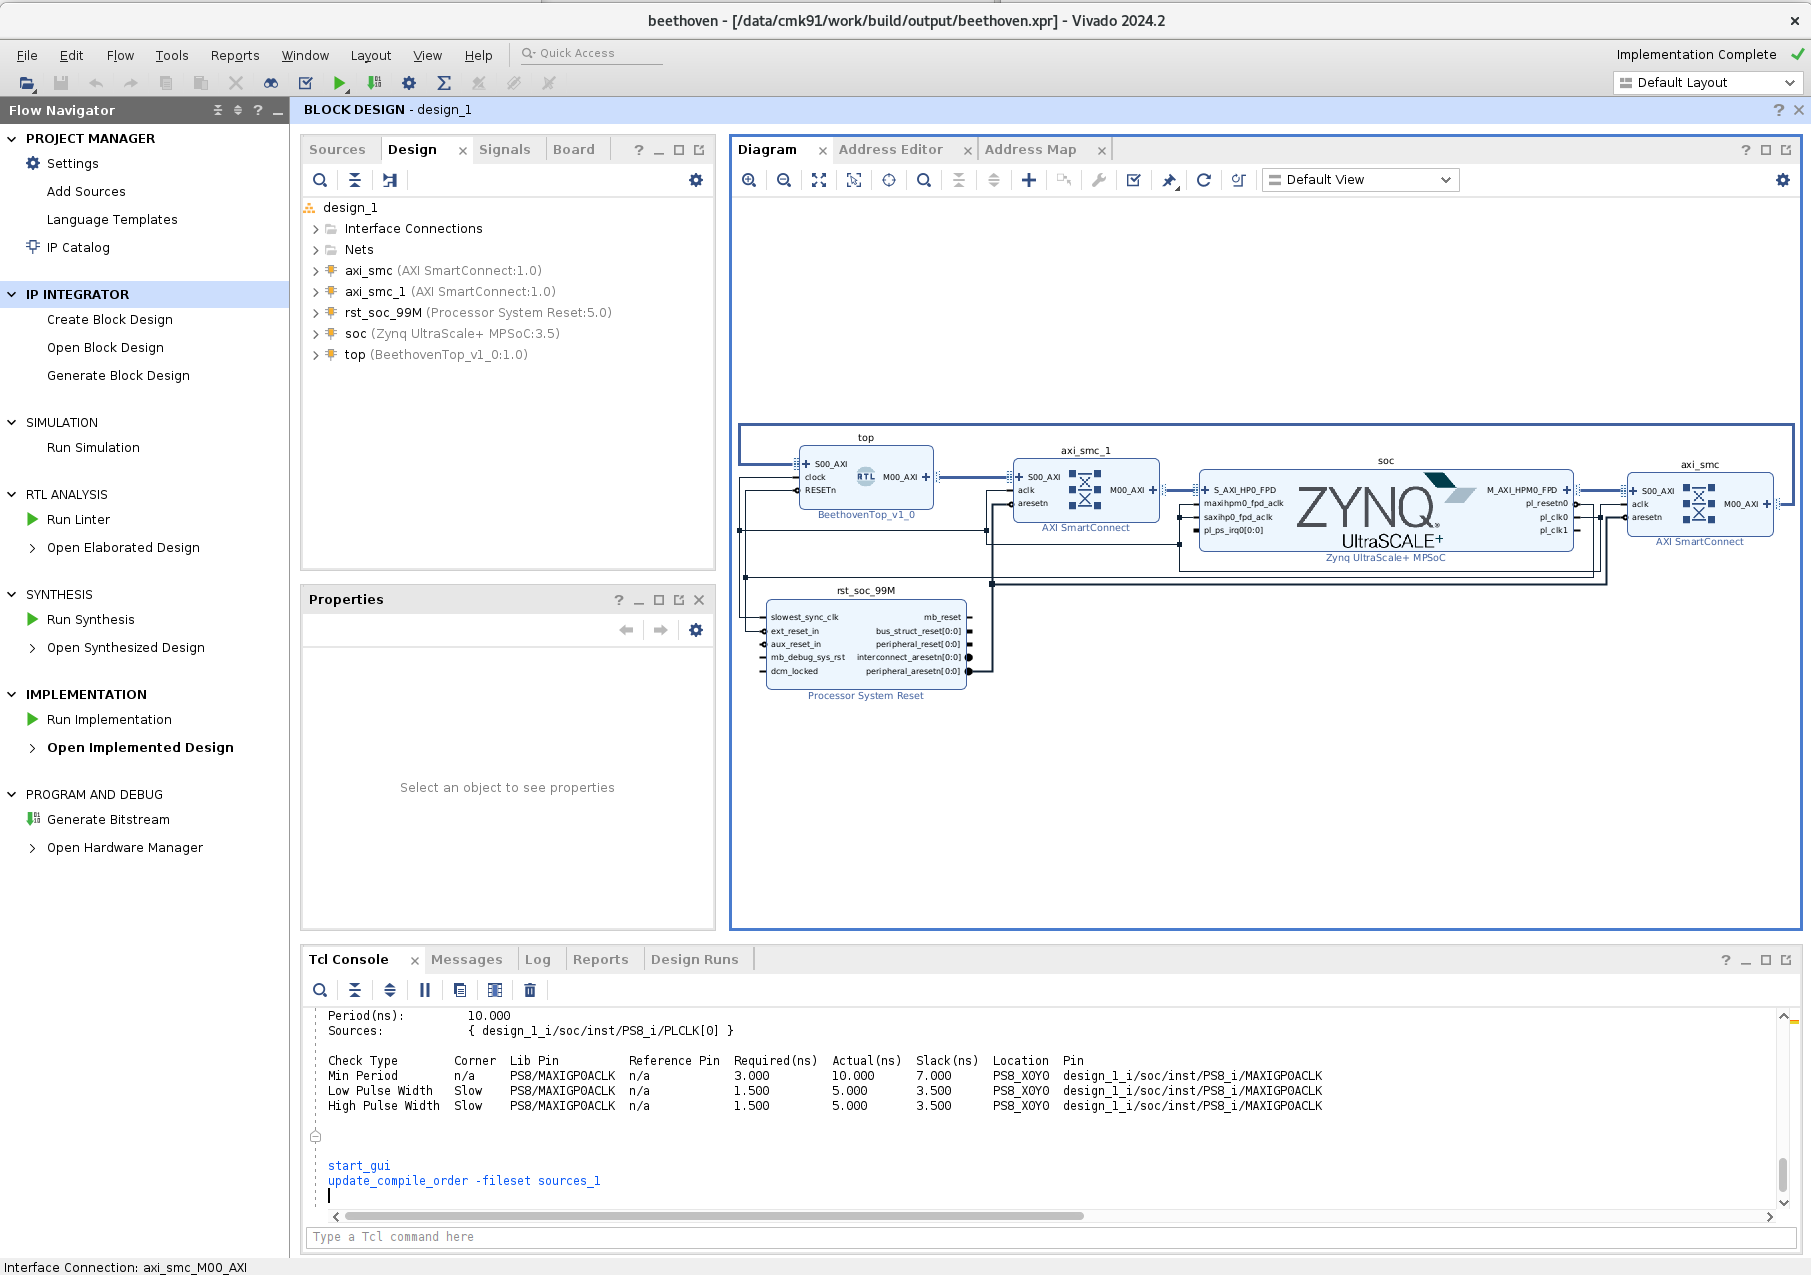
If you pass timing and all that good stuff (you can check under the "Open Implemented Design" tab on the left panel), then generate bitstream (also on the left panel). Once you're done there, open up the hardware design like so:
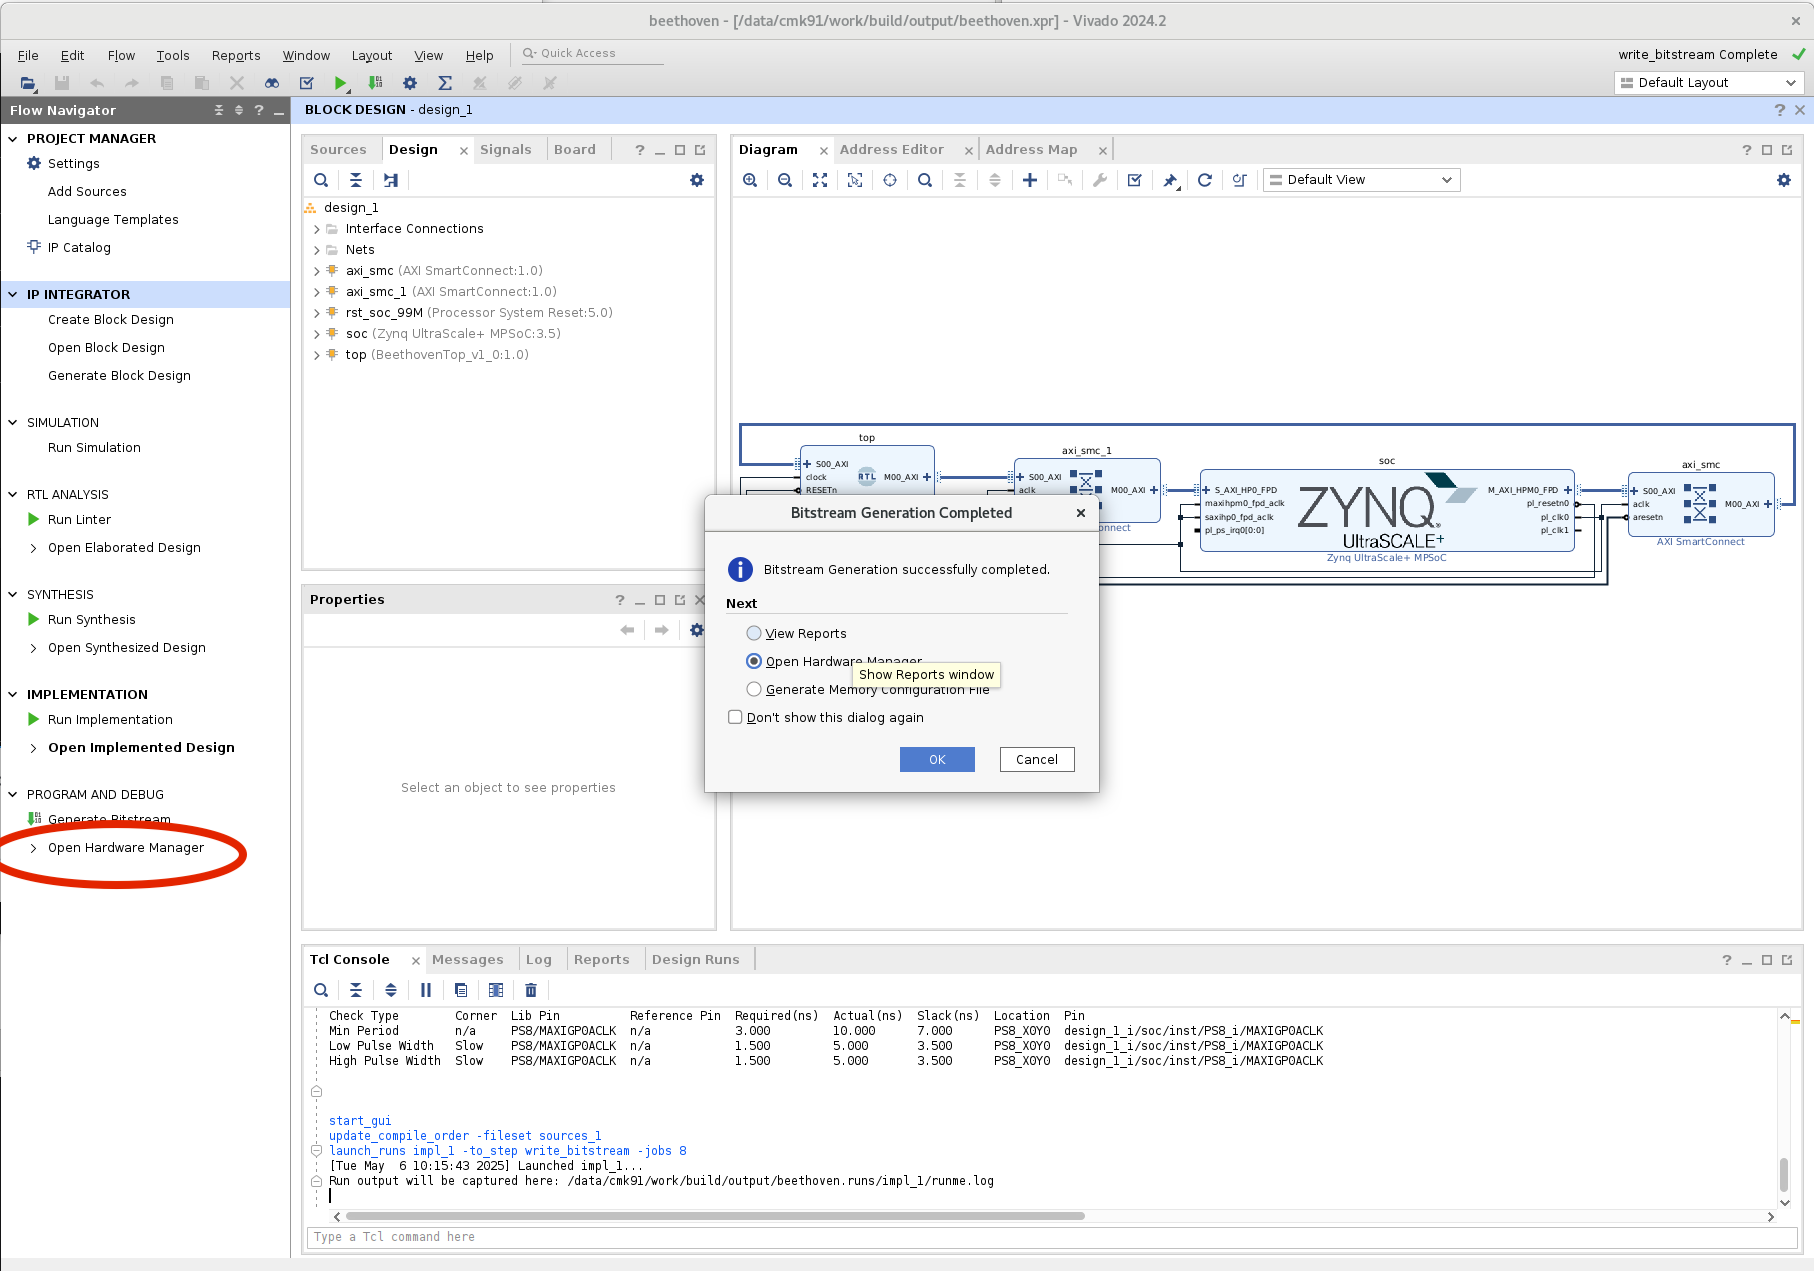
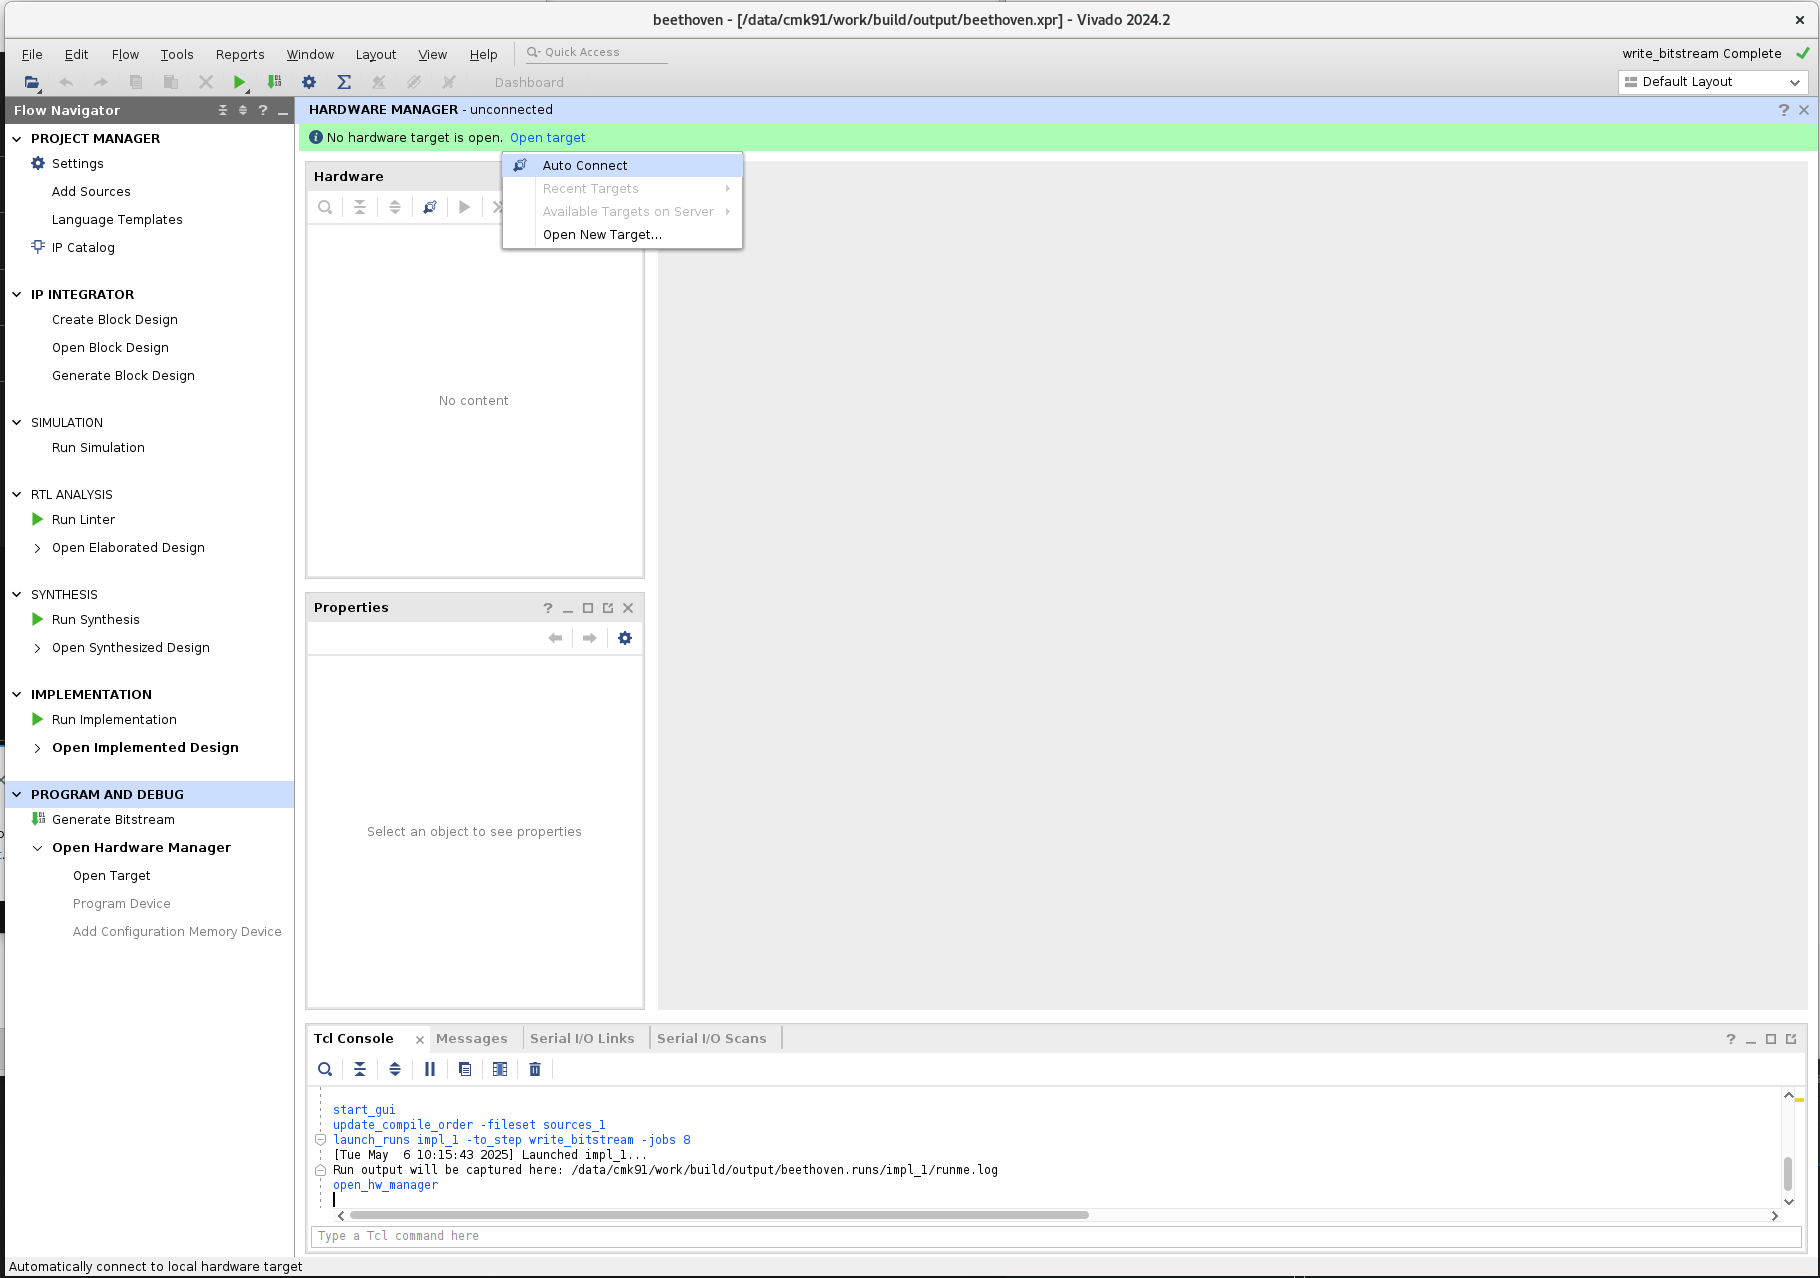
Start up the hardware server next. If you've installed the cable drivers correctly, it should all just work.
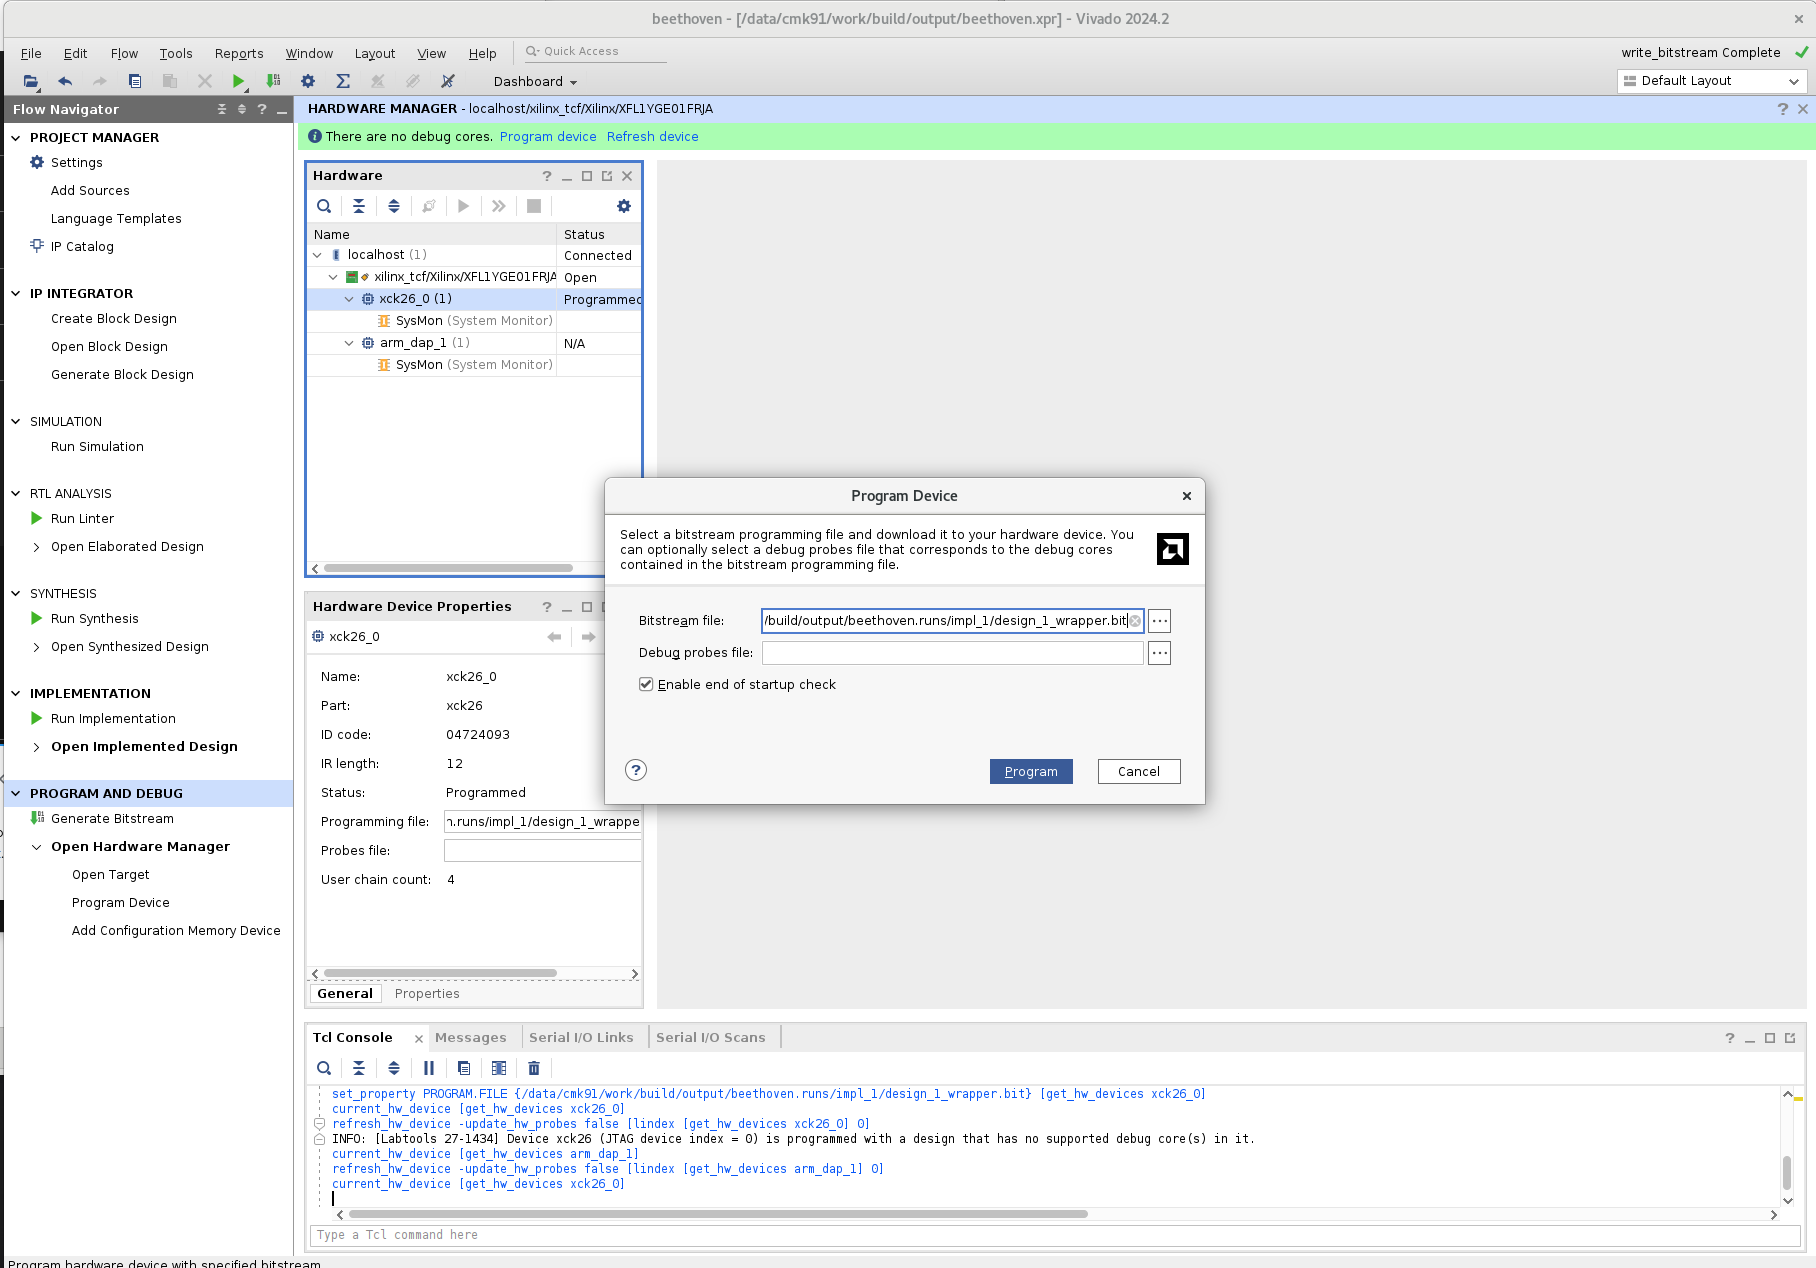
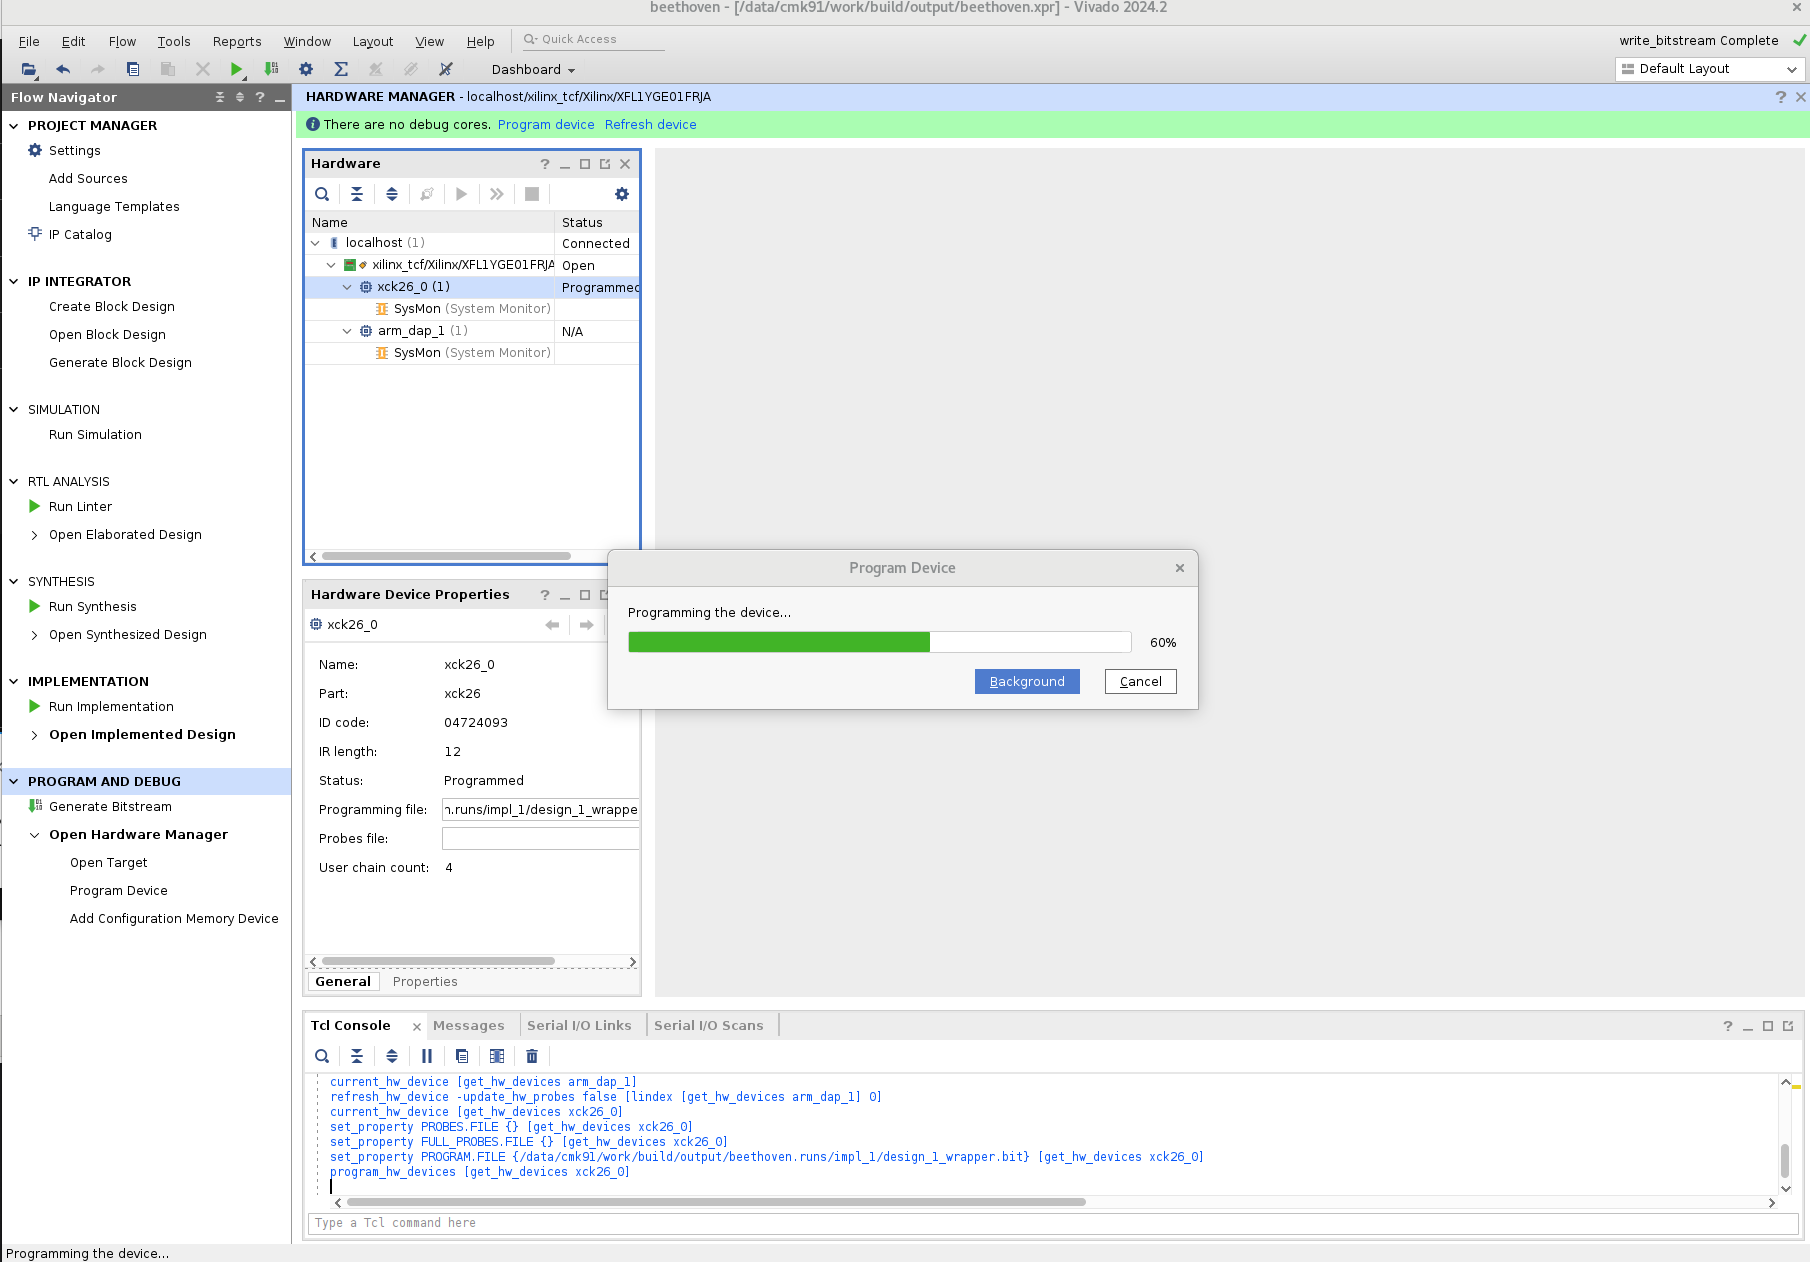
Next, right click the FPGA on Kria and program it using your bitstream:
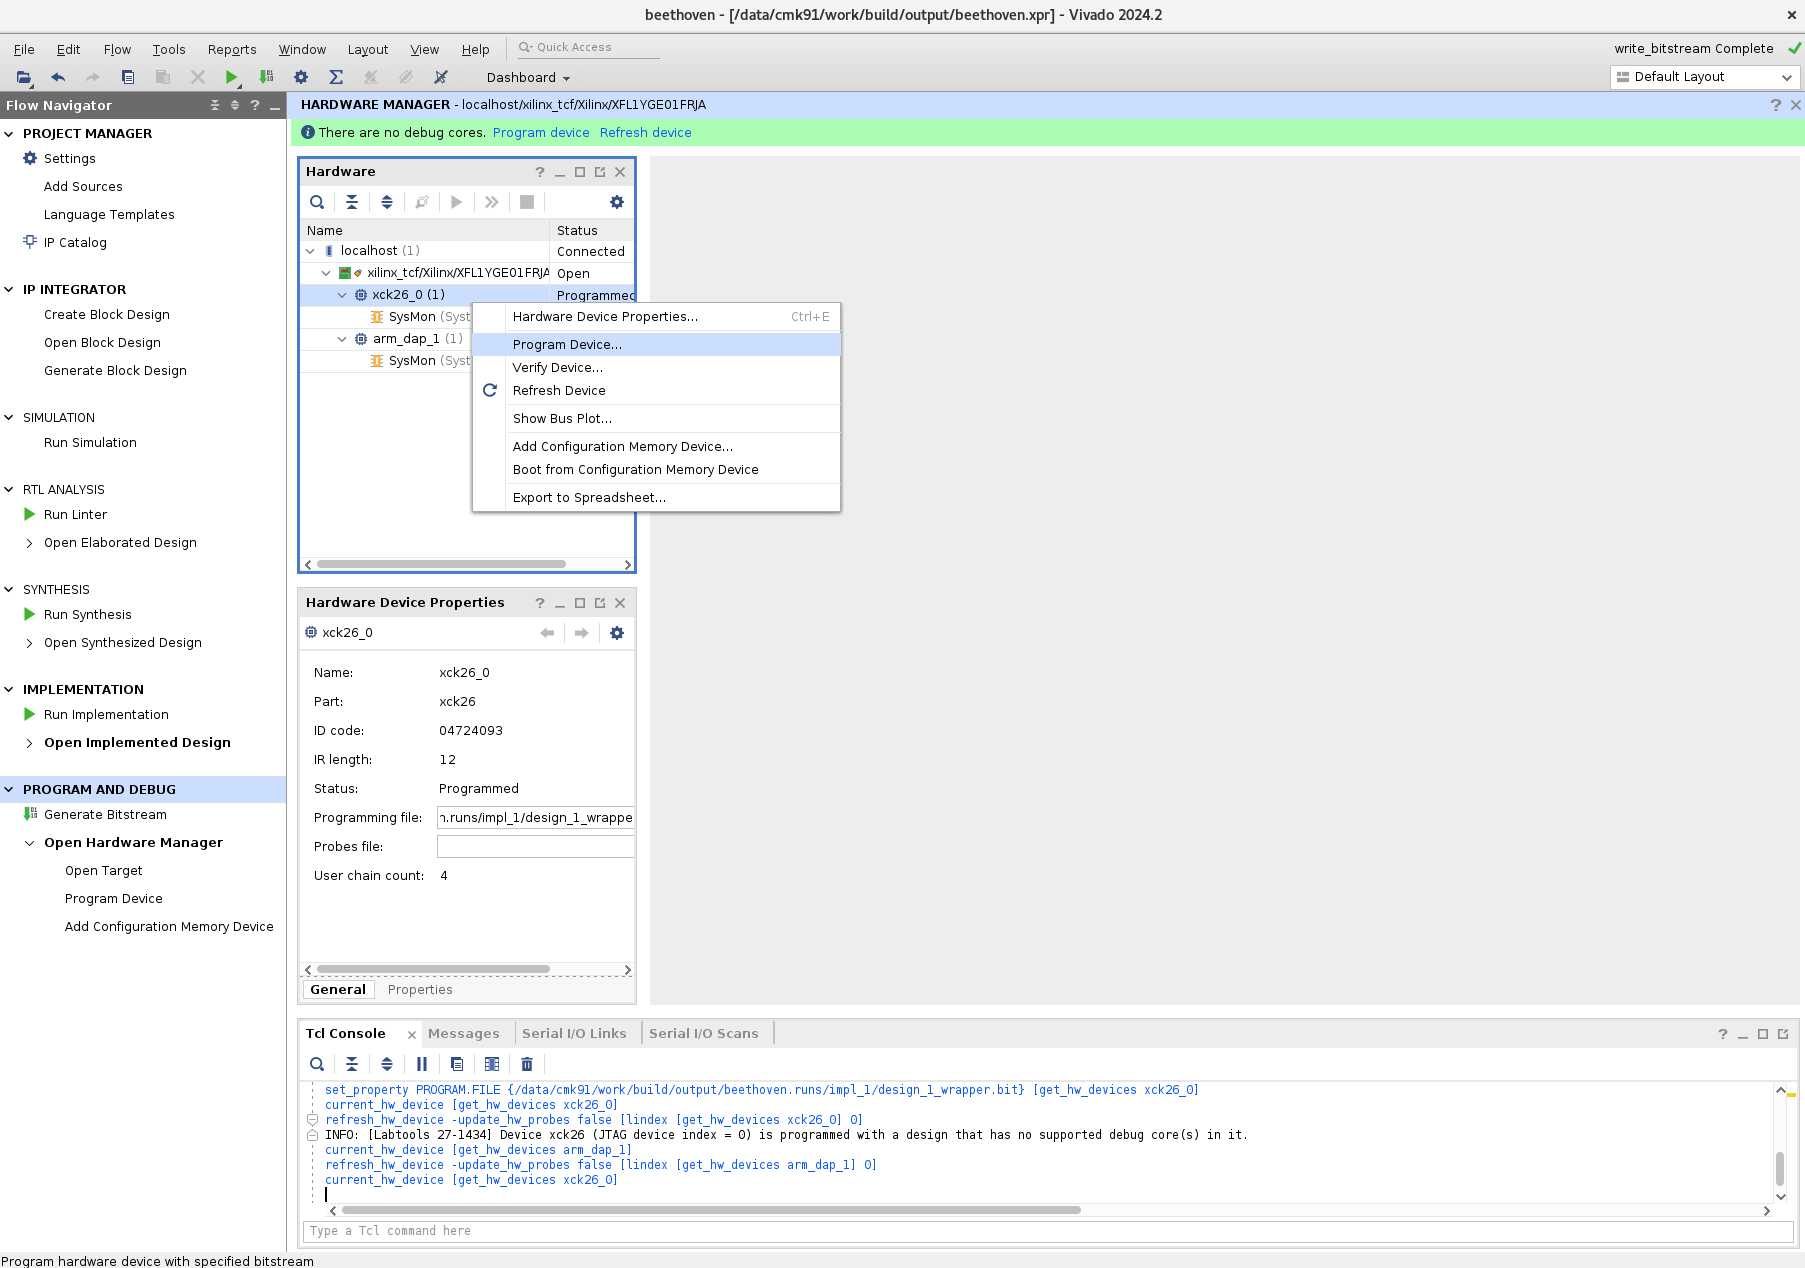
Now you may hear the fan spin up on your Kria board because the FPGA is active. We've had trouble with the fan control in petalinux so we have a fan with an external manual control to keep the office quiet.
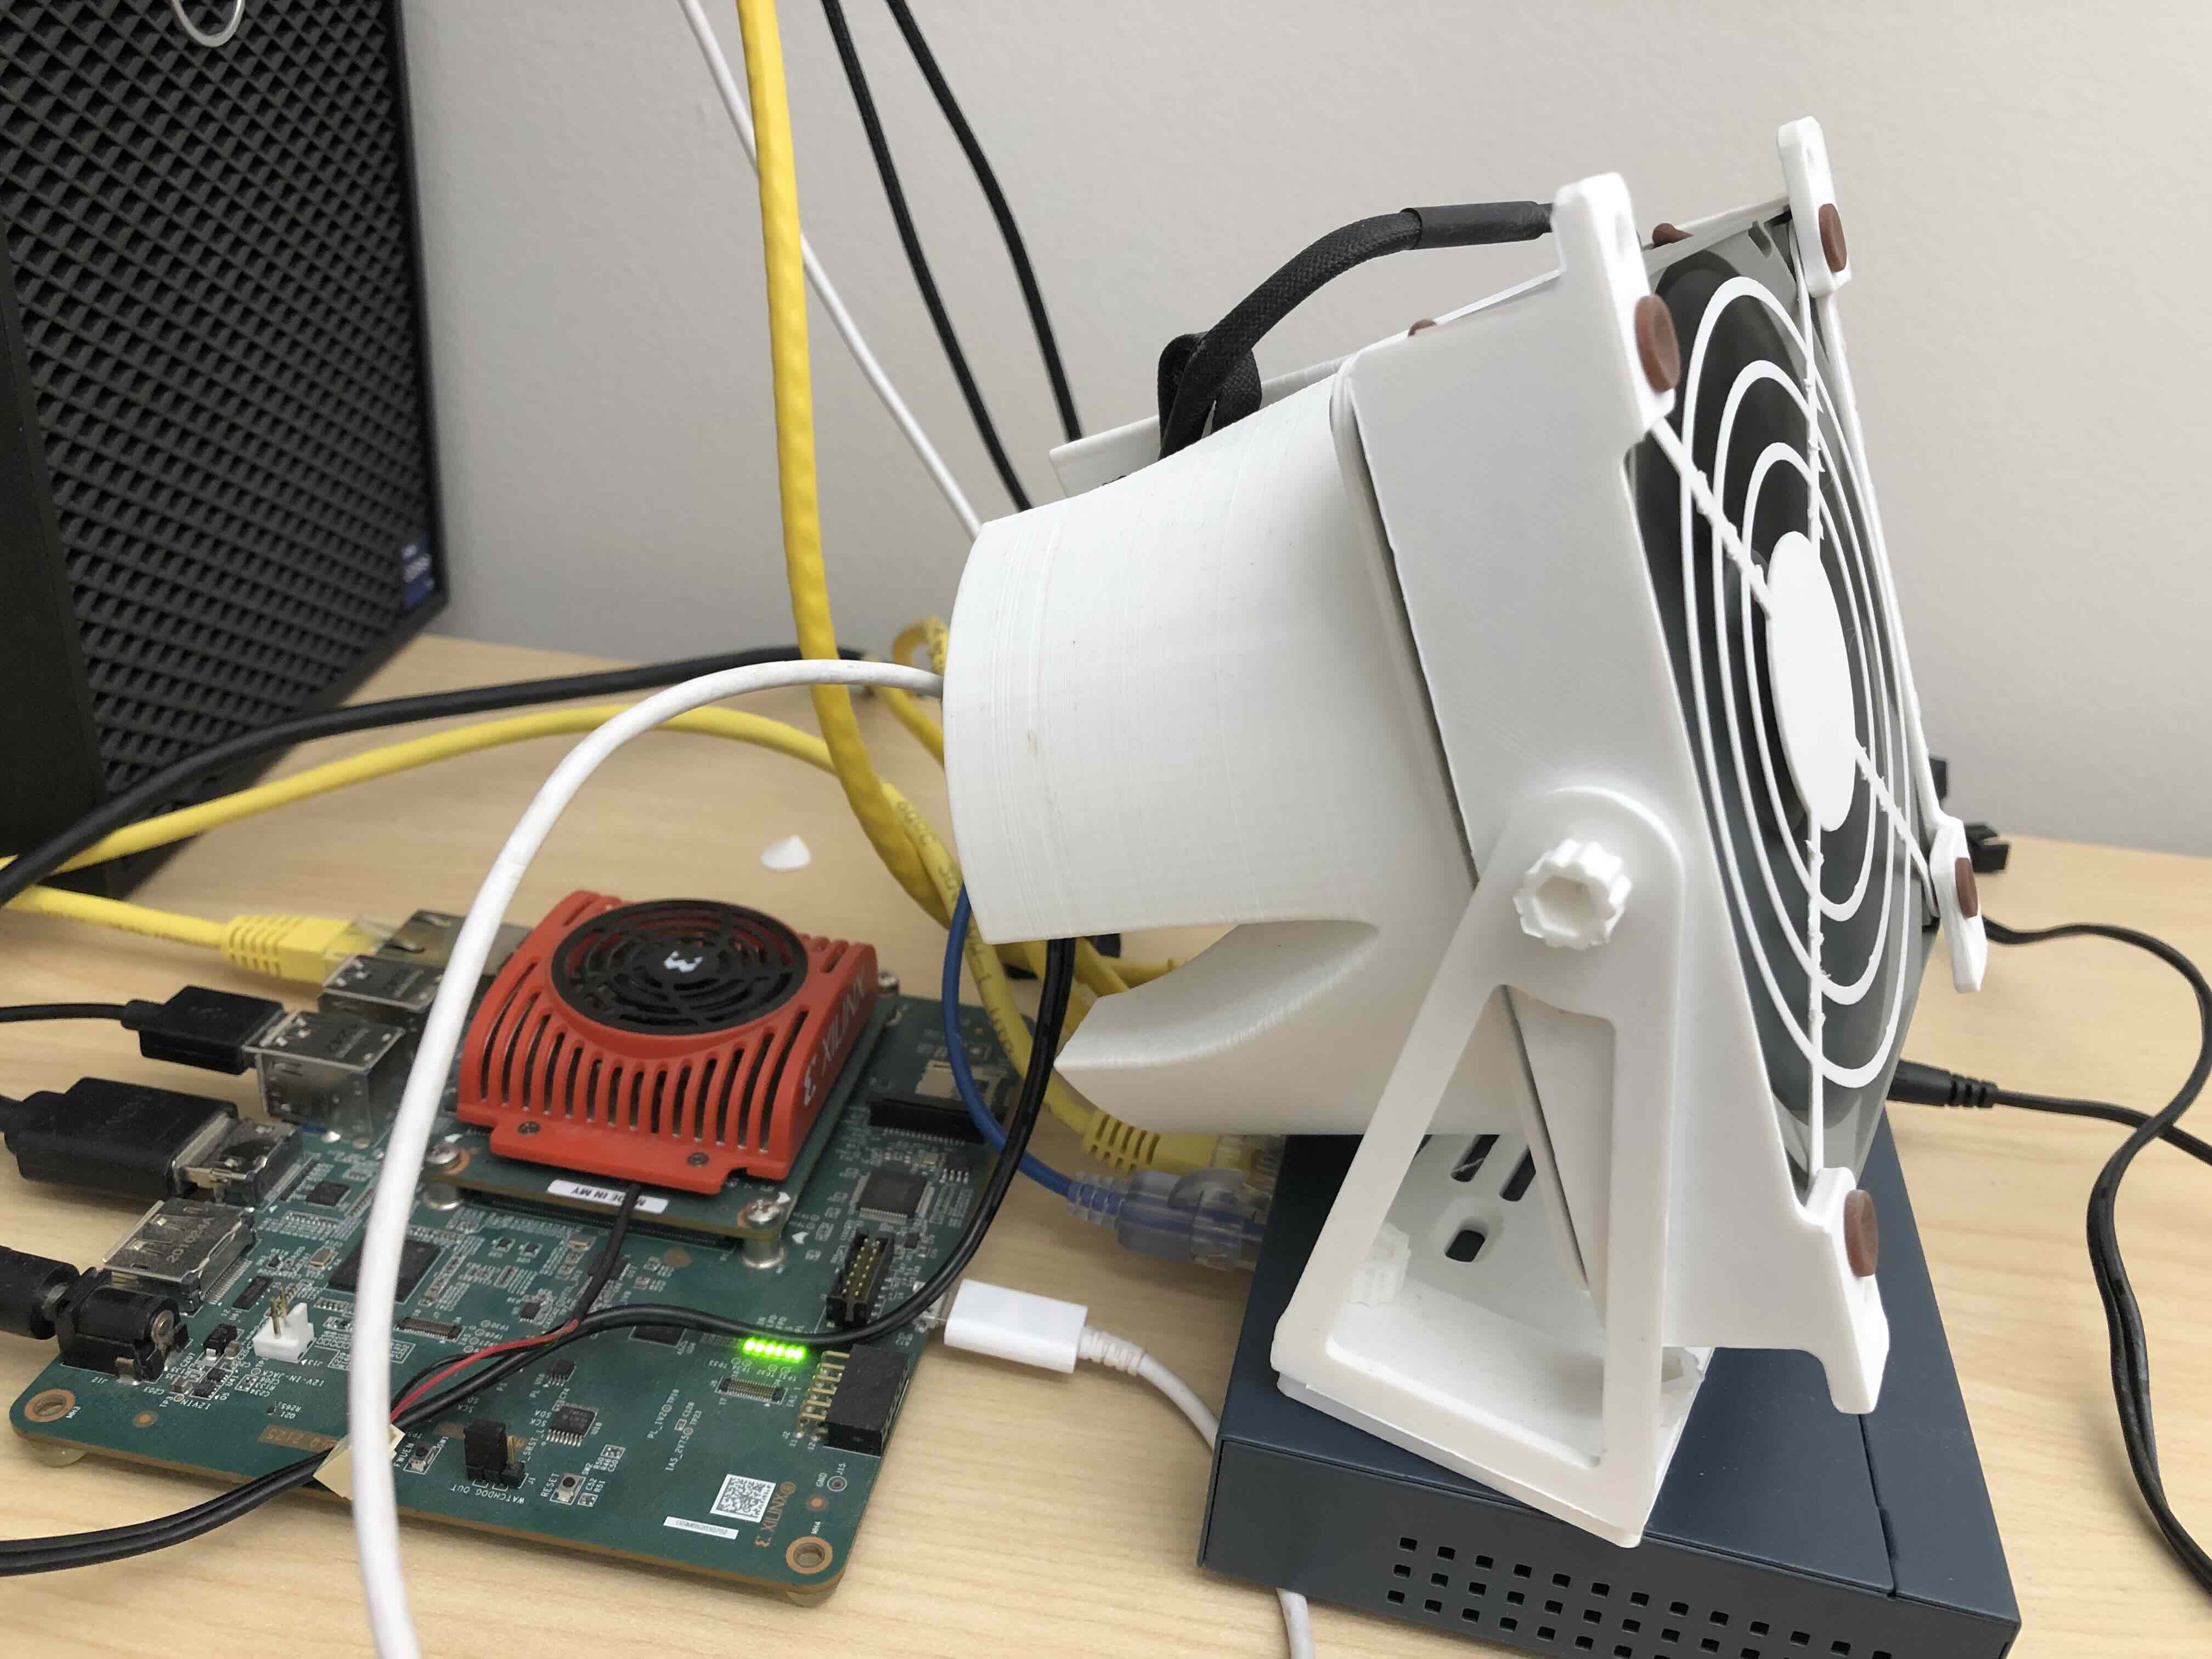
Our Office Setup. EDA box to the left, Kria, network switch and fan center. The white cable connects the micro-USB Kria connector to our EDA box for JTAG.
Running on Kria
Environment Setup
First thing's first, make sure your environment is set up correctly. In our ~/.bashrc on kria, it's important that
we first install the correct C/C++ compilers:
dnf install g++ gcc python3
This should install something like version 12.2 or similar. These have support for C++17 so they will be sufficient. Next, install Cmake from source. Unfortunately, this seems to be necessary because the Kria repos do not have a package for this.
Now, get your ~/.bashrc in shape. These are the most important lines to have. This assumes that your user is petalinux.
export CXX=aarch64-xilinx-linux-g++
export CC=aarch64-xilinx-linux-gcc
export BEETHOVEN_PATH=/home/petalinux/Beethoven
Go ahead and mkdir ~/Beethoven. Now, get the Beethoven environment.
git clone https://github.com/Composer-Team/Beethoven-Software
git clone https://github.com/Composer-Team/Beethoven-Runtime
git clone https://github.com/Composer-Team/Beethoven
cd Beethoven-Software
mkdir build
cd build
cmake .. -DCMAKE_BUILD_TYPE=Release -DPLATFORM=kria
make -j4
sudo make install
cd ../../
cp Beethoven/bin/kria/kria_mm.py ~/
You should now have the software installed correctly and a file called kria_mm.py in your home directory. Because the
Kria system shares the same DRAM space between FPGA and CPU, the operating system needs to know about any allocations
that you use in the FPGA, in contrast to the discrete FPGA boards. We use Linux Hugepages make large, physicaly contiguous
allocations that are accessible from the FPGA and cache coherent with the CPU. However, these pages need to be
preallocated so we provide this script.
Whenever you run the kria_mm.py script (sudo required), you should get the following.
xilinx-kv260-starterkit-20241:~$ sudo python3 kria_mm.py
Password:
Hugepage allocations----------------------
[idx]	[name]             	[n_alloc]	[n_free]

[0]	    hugepages-2048kB   	0		    0
[1]	    hugepages-32768kB  	0		    0
[2]	    hugepages-64kB     	0		    0
[3]	    hugepages-1048576kB	0		    0
Which hugepage allocation to modify (enter to quit)
>
To allocate 64 of 2048kB blocks, we would type 0, <enter>, and then the number of blocks, 64.
The script will wait a second and make sure the effects have persisted. Allocating extremely large blocks (e.g., 1GB) may
fail if the system does not have any allocations of that size available.
After the above commmand, the final printout should look something like this.
xilinx-kv260-starterkit-20241:~$ python3 kria_mm.py
This script must be run as root
xilinx-kv260-starterkit-20241:~$ sudo python3 kria_mm.py
Password:
Hugepage allocations----------------------
[idx]	[name]             	[n_alloc]	[n_free]

[0]	hugepages-2048kB   	0		0
[1]	hugepages-32768kB  	0		0
[2]	hugepages-64kB     	0		0
[3]	hugepages-1048576kB	0		0
Which hugepage allocation to modify (enter to quit)
> 0
Current allocation of [hugepages-2048kB]: 0/0 available
How many hugepages to set the max allocation to?
> 64
Set allocation of [hugepages-2048kB] to 64. Waiting a second to recheck...
Rechecking...
Successfully set allocation of [hugepages-2048kB] to 64
xilinx-kv260-starterkit-20241:~$
Allocations that use standard page sizes (4kB) will still use standard pages, but for anything larger, we'll use the smallest page size available. Unfortunately, this means you should have a good idea of how many pages you'll need before hand. The allocator will throw and if it fails to allocate, so these situations should make themselves immediately visible.
Moving Over Headers
It would be a pain to build your hardware and generate the headers on Kria so we use rsync to move over all the necessary headers
from the EDA/development machine.
rsync -rzah $BEETHOVEN_PATH/ petalinux@<KRIA_IP>:~/Beethoven/
Build Runtime and Go!
Then, on Kria, we can build the runtime.
cd ~/Beethoven-Runtime
mkdir build
cd build
cmake .. \
    -DCMAKE_BUILD_TYPE=Release \
    -TARGET=fpga \
    -DBACKEND=Kria
make -j4
sudo ./BeethovenRuntime
In a different TTY, we can run our testbench. The testbench will use the same build procedure as with simulator or any other backend.
Then, just run with sudo and voila!